Fun with gels
This was a workshop with the Lightspot meetup group, run by TechnicalBoy at his Studio in Netil House, Hackney
The session was roughly broken down into three segments. The first segment was TechnicalBoy talking us through the concepts and approach for using Gels.
How they should be used on the lights and the effects that they would produce. One of the key things is you get a much less intense colouring than you would expect with the overlay. TechnicalBoy explained that by increasing the number of sheets of gel in front of the light you could increase its colour, but at the expense of the power of the light. Like most things in photography, there is a pretty much even trade. He also showed us the step by step process of taking shots and amending the lighting to find the sweet spot. This was done light at a time, each light giving the desired effect before moving on to the next.
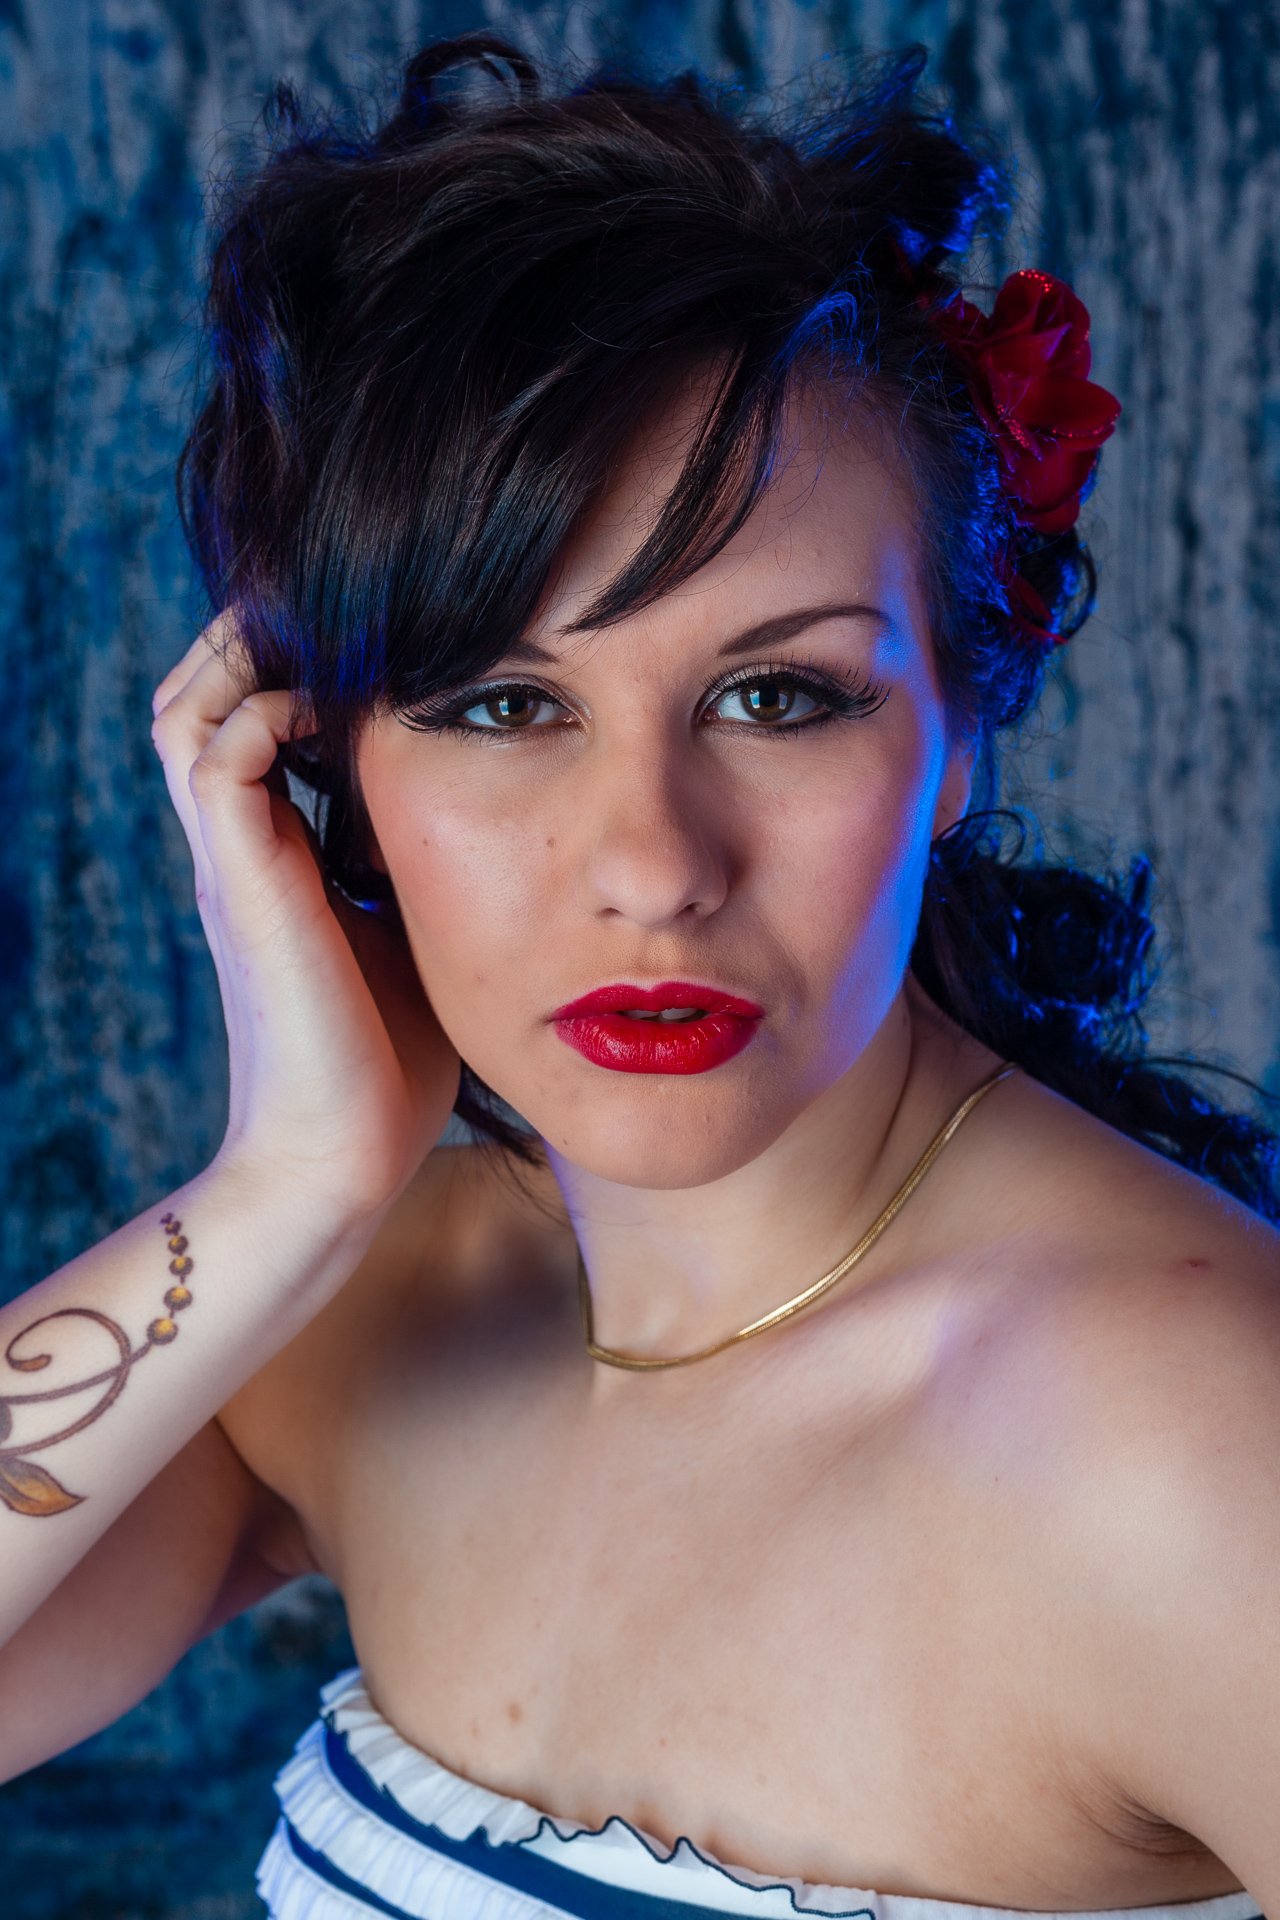
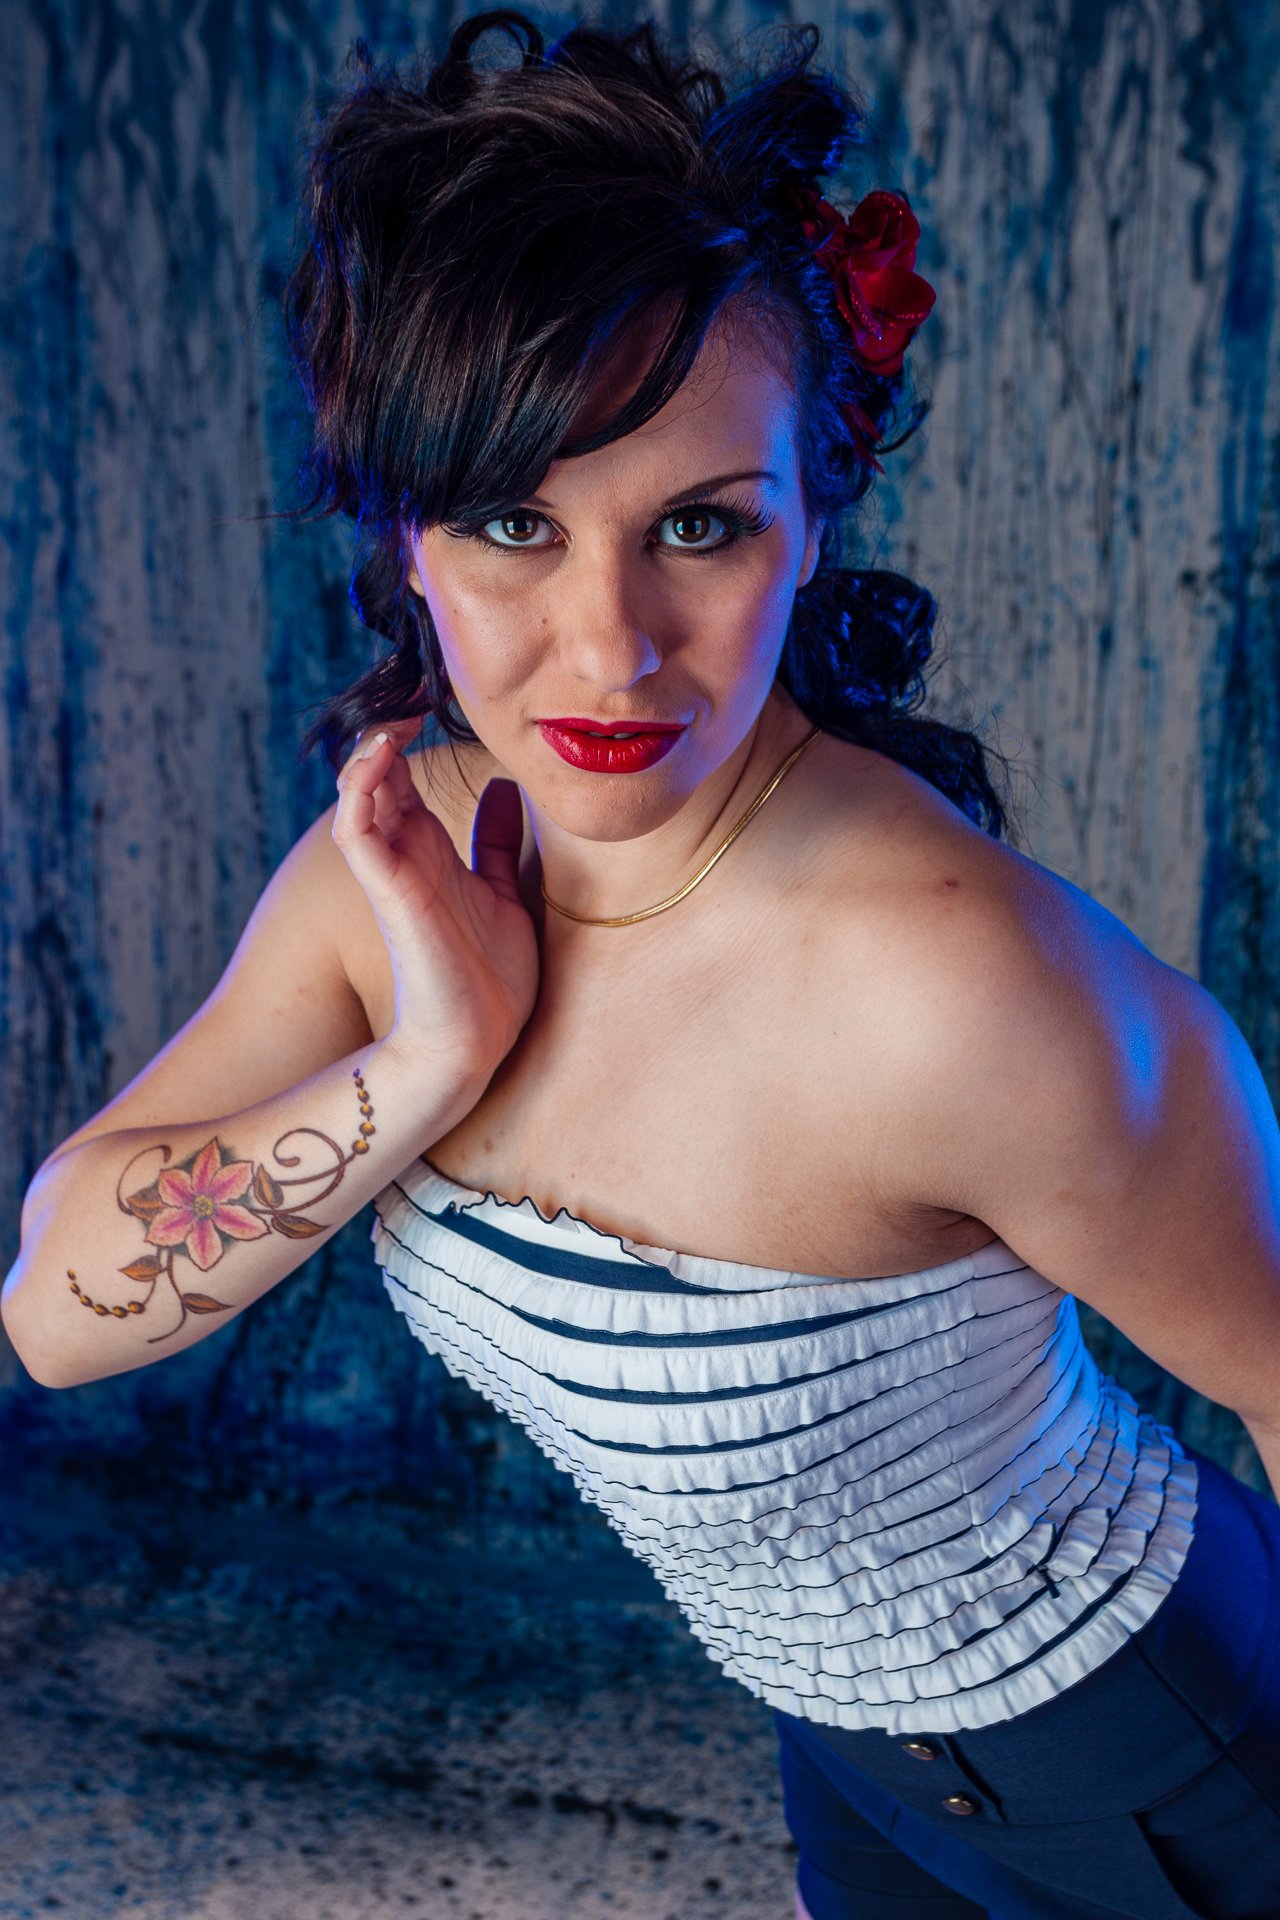
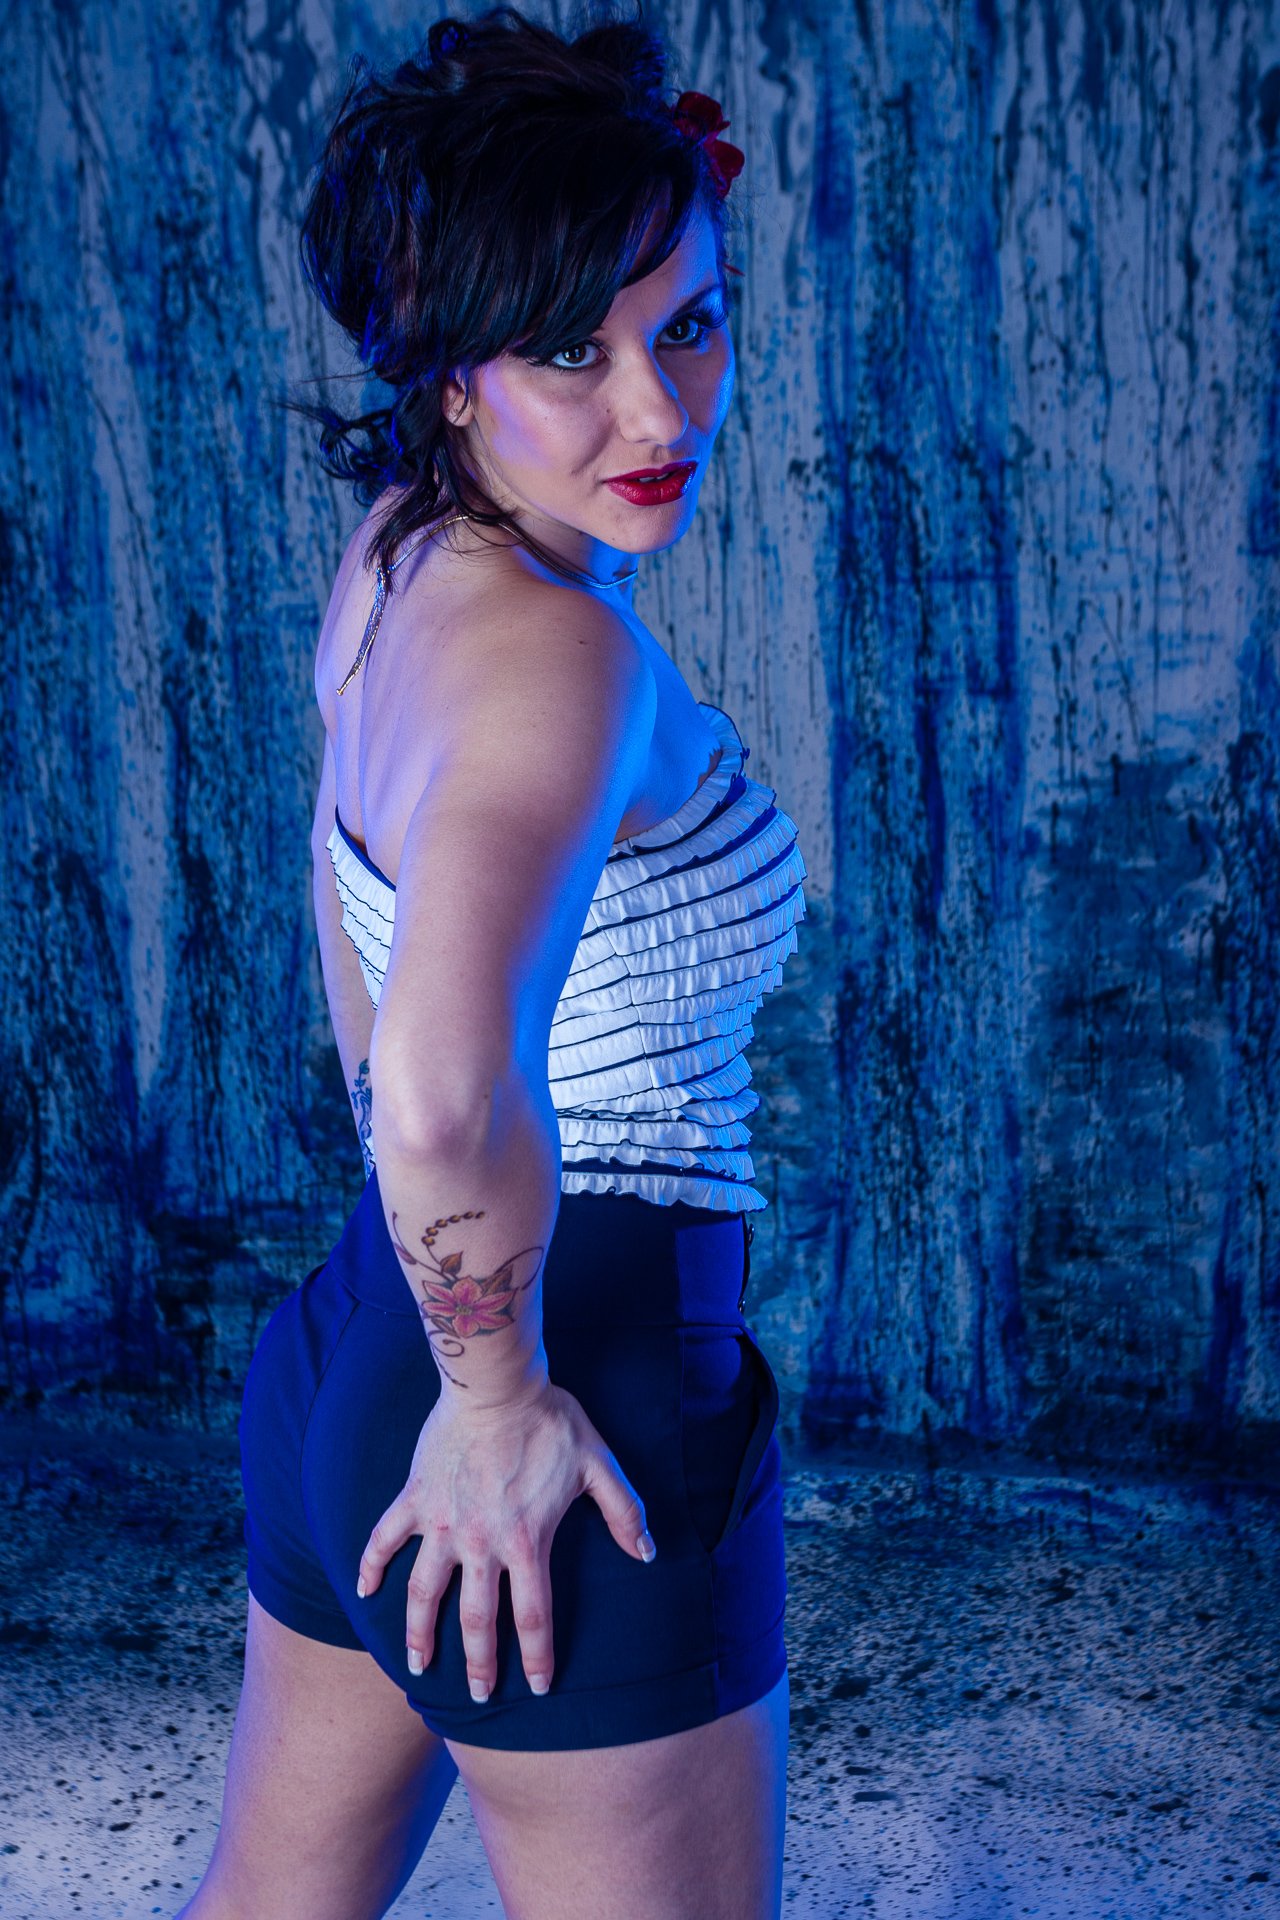
The second segment was us shooting with the lovely Gemini Rayne using a fairly traditional, though light-heavy setup. Two rear lights, both of which had dark blue gels on them, and two front lights, (the main light and one to even out the lighting and remove harsh shadows) both of these had lighter blue gels on them. The idea was to give the models a blue 'outline' without washing her or the image out. The key here is a degree of subtlety rather than making the whole image blue.
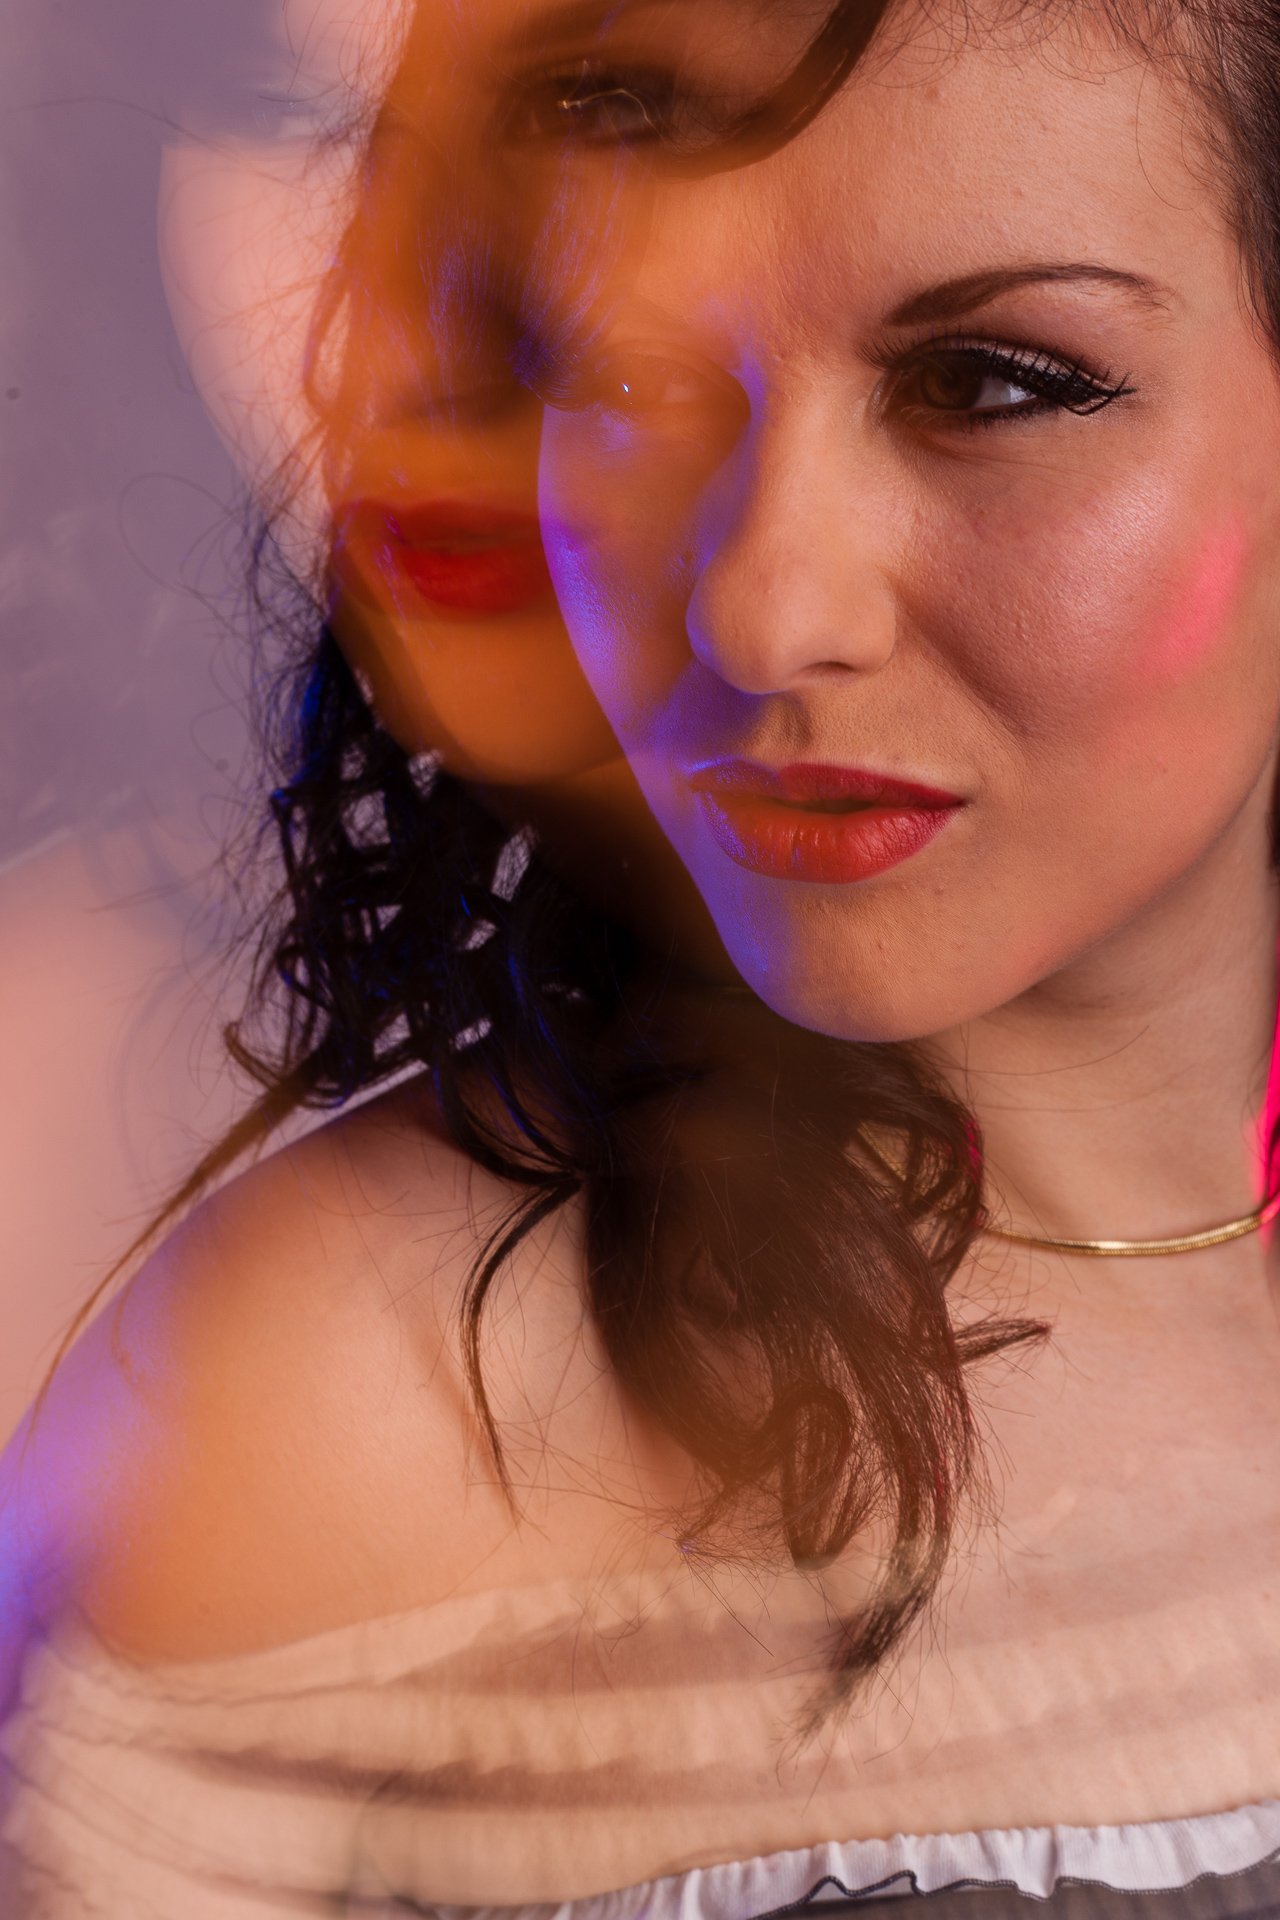
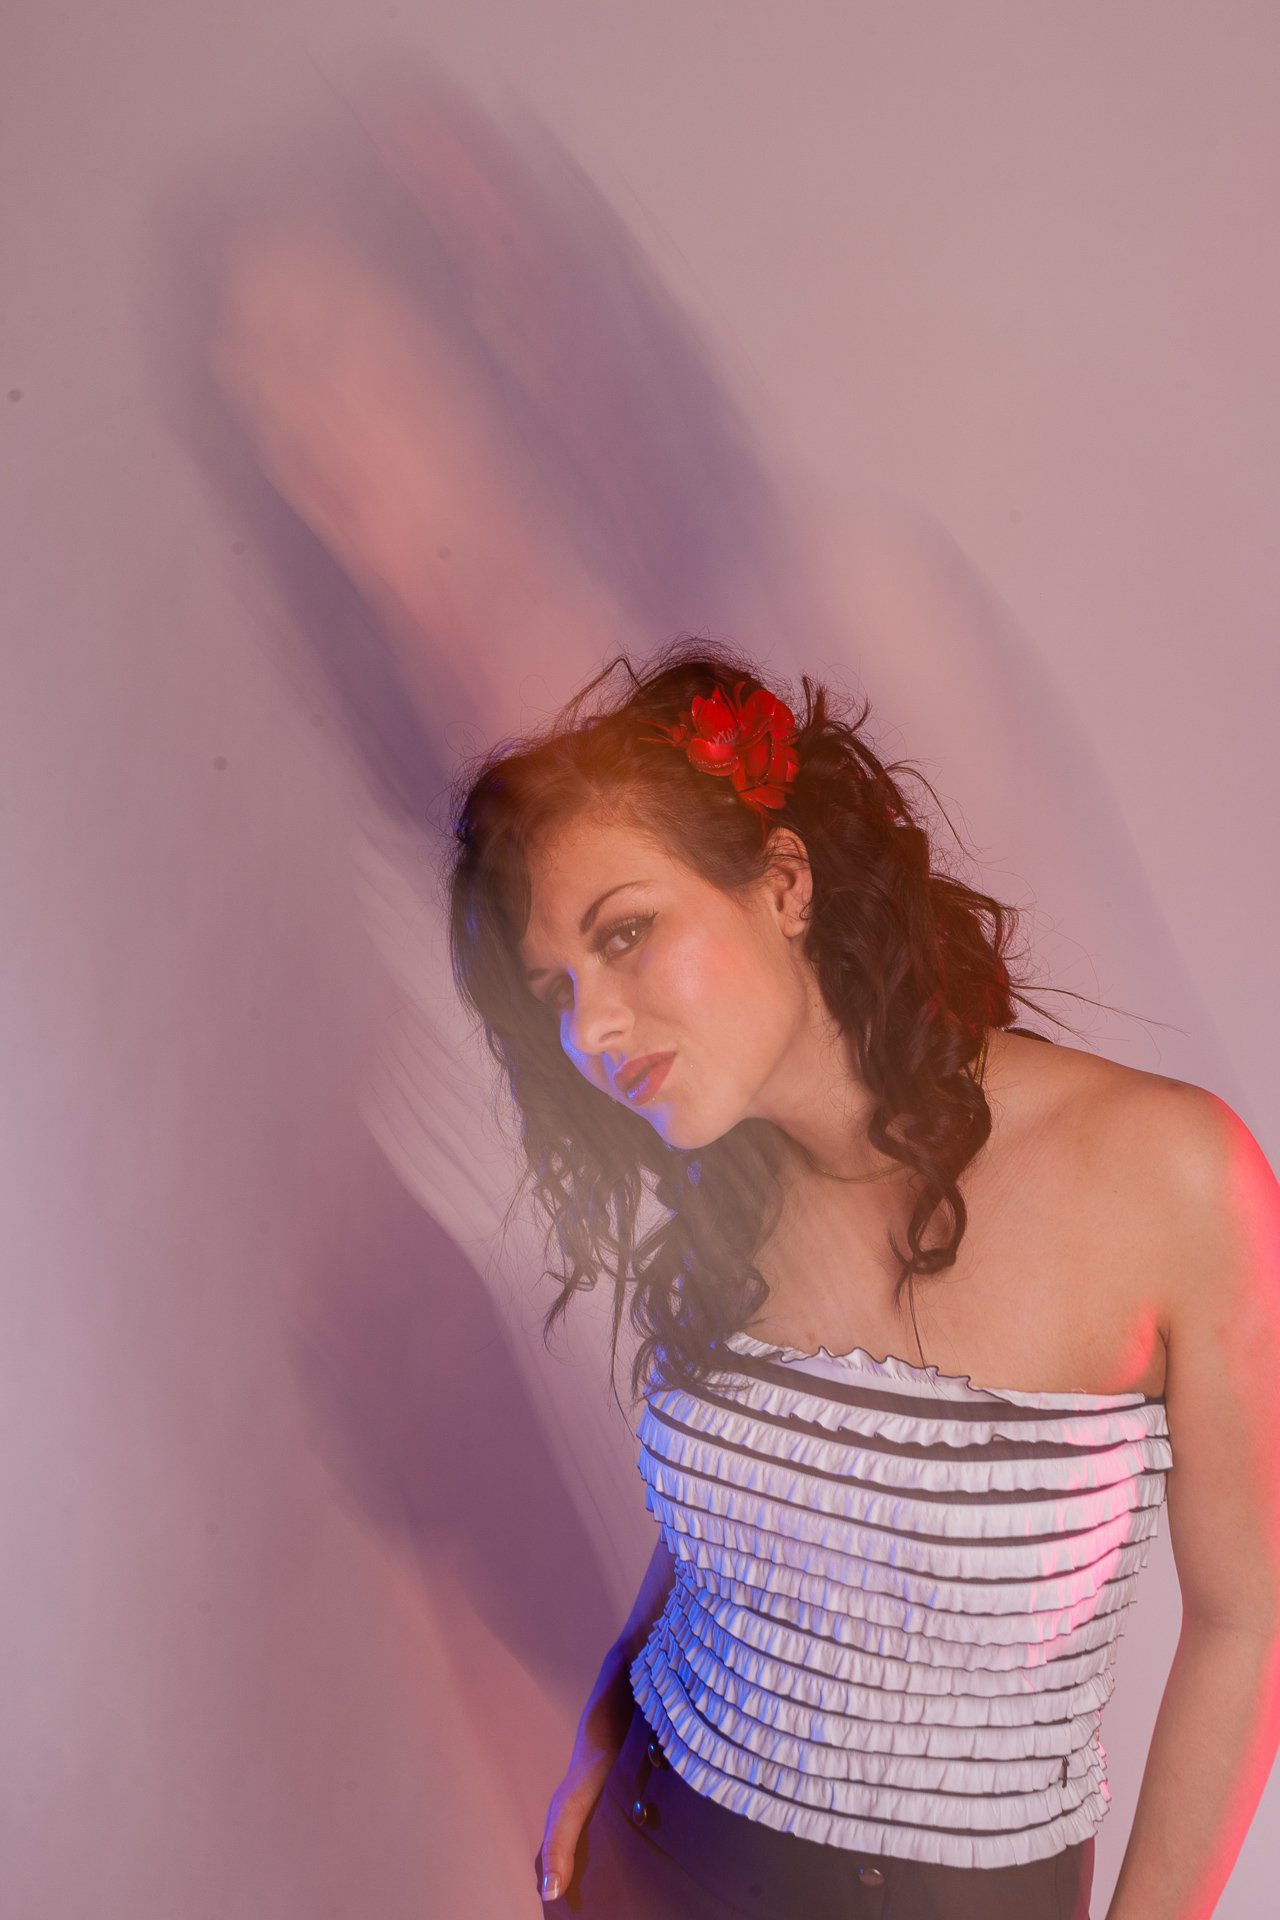
The final session was about the effects you can generate through motion blur and how they can be particularly effective with the addition of coloured gels. Setting the shutter speed to something quite slow, I used between 1/3 of a second and 1 second, you captured the main image when the flash burned and then got a motion effect with the use of the ambient remaining light. Naturally, the length of the shutter and the availability of light in the studio have a substantial effect on the image results. The trick I found most effective was to shoot and very quickly move the camera and hold it as steady as possible to build up a second image overlaid but partially transparent on the first. The other effective trick, recommended by TechnicalBoy was to use the zoom to get one large and one small image on the same picture. Both of these examples can be seen in the images attached to this post.
It was a really interesting event, one of the issues I've always had is experimentation tends to take a back seat, in order to get the good shot I know I can take. It was really good to do an event where I'm not only encouraged, but assisted in experimentation.